Earth Science Week Classroom Activities
Exploring ‘Wild’ Places with GIS
Activity Source:
ESRI, 2008. Adapted with permission.
Does your neighborhood have “wild” places? What’s “wild”? What’s the personality of the environment between home and school? What’s there? How do you relate to it? How does your perspective of local geography change between being on the ground and exploring from above?
Regardless of where you live, engaging with the landscape means exploring spatial relationships between human and natural phenomena. Geographic information systems (GIS) technology (www.gis.com) provides an effective way to visualize and analyze these places, and your contact with them.
There are many GIS tools available - from simple Web mapping to sophisticated applications. All can be explored at the ESRI Education Community for K-12 Schools along with pathways to data, lessons, and other content. One of these GIS tools is a free, Windows-based, 3-D virtual globe - ArcGIS Explorer. Explore your neighborhood … and the world.
Materials
- Computer with broadband Internet connection
- ArcGIS Explorer free Virtual Globe software from ESRI (below)
Procedure
- Learn about, download, and install ArcGIS Explorer.
- Launch and use the “Find Address” task to pinpoint your home or school. Embark on a local investigation - notice human and natural features. Where does one or the other “prevail?” Are there any shifts in these patterns as you navigate? Do you see things that you don’t notice while you are walking on the surface?
- Head for somewhere very different. If you live on the plains, go to a coast. If you live in the mountains, zoom to a big city. In doing so, notice what’s similar and what’s different.
ESRI
4. How far to “wild”? “Wild” can be anything - a nearby park, a footbridge crossing a creek, the “undiscovered” part of the school grounds. Find your home or school. From the front door, use the ArcGIS Explorer “Measure” task to determine the distance to a “wild” location.
5. With field “tools” - notebook, camera, GPS, probes - go there.
6. Being on the ground, what do you see that was not visible from above? Is it different from the imagery (time of year, clarity of view, changes in what’s there)? Identify and record information about a few items of note - rock formation, stream pattern, impervious surface, pollution source.
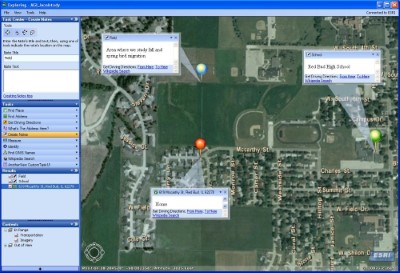
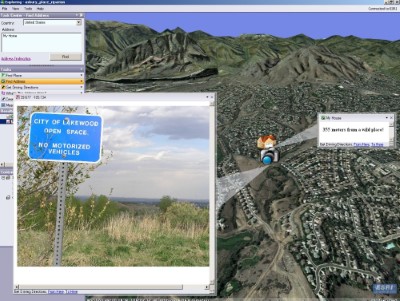
7. Bring the information back for mapping. Create GPS (latitude/longitude) databases with attributes (stream characteristics, rock types, etc.). Tie photos, videos, text, URLs, and so on to locations. (See lessons) In the example below, a text box is tied to a selected house and a photograph to the nearest wild place - a riparian zone at the foothills of the Rocky Mountains.
8. Use ArcGIS Explorer’s “Import File” tool (GPS) or “Create Note” task (placemark) to add data/multimedia content on the map.
Celebrate GIS Day annually on 19 November! Find out more about the use of GIS in communities, including yours, via www.gisday.com. Participate in or host a GIS Day event.