Earth Science Week Classroom Activities
Observing Soil Respiration
Materials
- Local soil sample (approximately 2 cups)
- Disposable plastic water bottle
- Plastic tubing
- Small jar or clear container with an opening only slightly wider than the plastic tubing
- Small cup or 100 mL beaker
- Graduated cylinder
- Duct tape (or other waterproof tape)
- 5 g sugar
- 105 mL water
- Bromothymol blue and color change chart
- Plasticine clay (optional)
- Object to rest the small jar/container on (optional)
Procedure
-
Cut a plastic water bottle about a quarter of the way down. Leave a small portion intact so you can bend back the top of the bottle.
-
Fill the bottle a third fullwith soil and add 20 mL of water. Tap the bottle on a hard surface to get the soil to settle to the bottom of the bottle.
-
In a small cup or beaker, mix 60 mL of water with 5 g of sugar.
-
Add more soil until the bottle is two-thirds full, then add 30 mL of the sugar mixture.
-
Fill the bottle to the cut rim and add another 30 mL of sugar mixture.
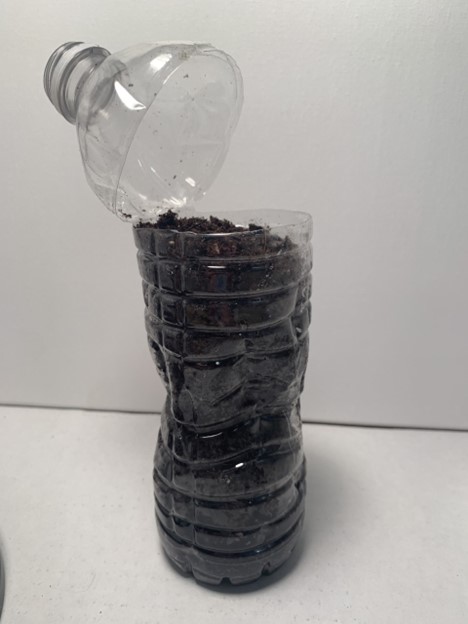
Credit: L.C.Mossa
-
Flip the top of the bottle down and secure it with waterproof tape, such as duct tape.
-
Insert one end of the plastic tubing into the bottle and secure it with tape (or plasticine clay), ensuring that its end rests right near the top of the soil in the bottle. Use tape to completely close off the opening of the bottle.
-
In a small jar or other small clear container, mix 25 mL of water with 10 drops of bromothymol blue.
-
Insert the other end of the plastic tubing into the container with the bromothymol blue mixture so that the tubing is submerged in the solution. You may need to have something for the small jar to rest on, depending on the length and flexibility of your plastic tubing.
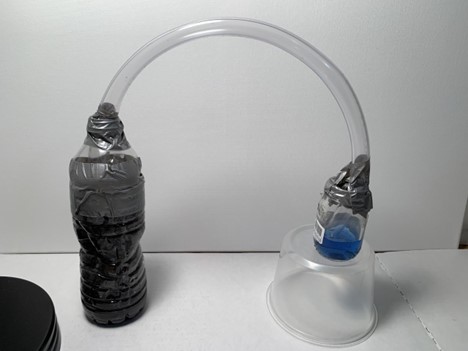
Credit: L.C.Mossa
-
Secure the tubing with tape, completely closing off the opening of the container. Make sure you can still clearly see the bromothymol blue solution.
-
Make observations (or take pictures) of the color of bromothymol blue solution for 3 days. Compare the color of the solution to the color change chart that indicates the pH of the solution.
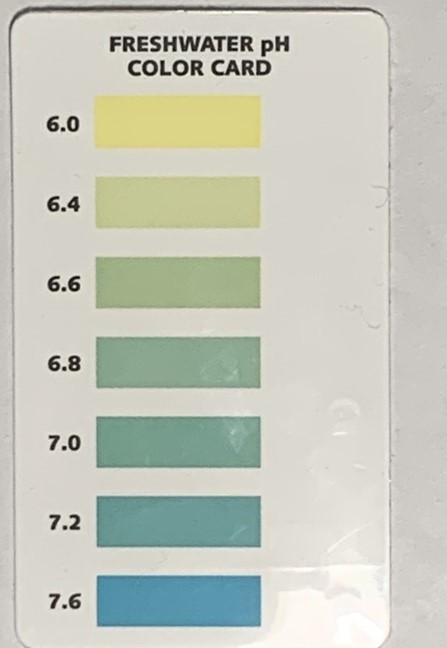
Credit: API Freshwater Aquarium pH Test Kit
Analysis
-
What was the original color of the bromothymol blue solution when added to water? What pH does this indicate? What was the final color of the bromothymol blue solution? What pH does this indicate?
-
Describe the color change that occurred in the indicator over the three days. Why do you think this change occurred? Was the change fast or slow? Why do you think that is?
-
How did this procedure provide evidence of soil exchanging carbon? Where did the carbon come from? Where does it go? How is it converted? Explain with words and/or a diagram.
-
What changes can you make to this setup to increase the rate or amount of soil respiration? If possible, test these changes and compare your results to the original to see if these variables affect the outcome.
-
How could a change in the soil respiration rate affect climate? Explain your answer.